Wednesday, September 18, 2013

Convert a FAT partition to NTFS


To convert a FAT partition to NTFS, perform the following steps.

Click Start, click Programs, and then click Command Prompt. In Windows XP, click Start, click Run, type cmd and then click OK.

At the command prompt, type CONVERT [driveletter]: /FS:NTFS. Convert.exe will attempt to convert the partition to NTFS.


NOTE:=
Although the chance of corruption or data loss during the conversion from FAT to NTFS is minimal, it is best to perform a full backup of the data on the drive that it is to be converted prior to executing the convert command

Increase your RAM and so system speed

1). Start any application, say Word. Open some large documents.


2). Press CTRL+SHIFT+ESC to open Windows Task Manager and click Processes tab and sort the list in descending order on Mem Usage. You will notice that WINWORD.EXE will be somewhere at the top, using multiple MBs of memory.


3). Now switch to Word and simply minimize it. (Don't use the Minimize All Windows option of the task bar).


4). Now go back to the Windows Task Manager and see where WINWORD.EXE is listed. Most probably you will not find it at the top. You will typically have to scroll to the bottom of the list to find Word. Now check out the amount of RAM it is using. Surprised? The memory utilization has reduced by a huge amount

5). Minimize each application that you are currently not working on by clicking on the Minimize button & you can increase the amount of available RAM by a substantial margin. Depending upon the number and type of applications you use together, the difference can be as much as 50 percent of extra RAM.


In any multitasking system, minimizing an application means that it won't be utilized by the user right now. Therefore, the OS automatically makes the application use virtual memory & keeps bare minimum amounts of the code in physical RAM.

HoW To UnInTall Or ReMoVe SoFtWaRe InSaFe Mode

If you have installed software on your computer and for any reason it gives you issues, the best thing to do is to uninstall it. Period. But what happen if such a piece of software keeps restarting your Windows operating system or worst, disables certain services so that you won’t be able to performs some important operation anymore ? In this case Windows will help you with a special feature called Safe Mode. Basically, in Safe Mode you will be able to troubleshoot your computer in order to fix issues. However, if you need to uninstall and remove some software, you have to know that this kind of “limited state” Mode has the Windows Installer Service completely disabled. Let’s see how to turn it on and uninstall everything… even in the Safe Mode configuration. Windows Installation Service is responsible for the installation and uninstallation procedure. If you try to access it in Safe Mode you will get the following message: “The Windows Installer Service could not be accessed. This can occur if the Windows Installer is not correctly installed. Contact your Support Personnel for assistance”. The following tutorial will teach you how to turn the Windows Installation Service in Safe Mode:

1. Click Start
2. In the Search field, type regedit and press Enter.
3. Locate the following registry key: HKLM\ SYSTEM\CurrentControlSet\ Control\SafeBoot\ Minimal\
4. Right-click on the Mininal key and from the menu select New – Key. Now name the new key MSIService and change the value to Service by double-clicking it.
5. If you are in the Safe Mode with Network Mode, repeat the above steps for the following registry key: HKLM\ SYSTEM#92;CurrentControlSet\ Control\ SafeBoot\Network\
6. The newly created MSIService will make available the Windows Installation Service in Safe Mode. However, I want to remind you that it is necessary to turn the new service on.
7. To do it, exit regedit, click Start and in the Search field type: services.msc and press Enter.
8. From the list, locate Windows Installer. Right-click it and select Start.
9. If the procedure to turn on Windows Installer doesn’t work try this one:
10. Click Start.
11. In the search field, type cmd. Do not press Enter.
12. Right click the Command DOS icon and click the Run it as Administrator link.
13. In the command prompt, type net start msiserver.

At the end of the whole procedure do not forget to restart your computer for the changes to take effect.

Secure your wireless Lan

Following actions should be taken.
  • The most important thing is to change the default password of your access point.
  • Firmware and the drivers of your wireless access point and wireless adapters should be up to date. They should be updates whenever necessary.
  •  There should be a combination of high level encryption and decent keys (WPA2/802.11i ) recommended.
  • Wireless users should be authenticated with different protocols like 802.1X, RADIUS, EAP (including EAP-PAX, EAP-PSK, EAP-TLS, EAP-TTLS, EAP-FAST, EAP-POTP, EAP-IKEv2, EAP-GPSK, PEAP, and EAP-SIM.
  • The above protocols give credentials including certificates, usernames, passwords etc.
  • Use Wireless LAN Security Tools for securing the wireless network. This software is specifically designed for securing 802.11 wireless networks.
  • Use a proxy for outgoing requests.
  • Always check the security of the wireless LAN using recent tools like Airbase, AirCrack-ng etc.
  • Make strict system logging on all the devices, do check your wireless log files regularly.
secure your lan, lan security, firewalls, anti-viruses,tcp , udp,lan,lan security,networking

HoW 2 ImProVe XP StUtDoWn SpEeD


Go to Start then select Run
Type 'Regedit' and click ok

Find 'HKEY_CURRENT_USER\Control Panel\Desktop\'
Select 'WaitToKillAppTimeout'
Right click and select 'Modify'
Change the value to '1000'
Click 'OK'

Now select 'HungAppTimeout'
Right click and select 'Modify'
Change the value to '1000'
Click 'OK'

CHANGE YOUR DRIVES BACK GROUND


Hello To All friend today i am going to showyou how can you change your drive background color . which always white . you can change it to more live with your own picture Or Your photo.

Just Follow Some Few Steps For Do this .


1. First your open your notepad


2. Just put this code in your
notepad

[ExtShellFolderViews]

{BE098140-A513-11D0-A3A4-00C04FD706EC}={BE098140-A513-11D0-A3A4-00C04FD706EC}
[{BE098140-A513-11D0-A3A4-00C04FD706EC}]

Attributes=1


IconArea_Image=name.jpg

 IconArea_Text=1000x000f00001


[.ShellClassInfo]


ConfirmFileOp=0


3. Now save it as desktop.ini and save in your drive you like example drive E Or D .


4. Now copy your image file to same location .


5. open your drive from explorer or just open it from
My computer

6. What You Find ?


********try to show there any nice image for
back ground*******

I hope you find this tips very helpful for you


and please don't forget to subscribe to ur feed
.

Hide Drive With Cmd

To hide a drive:

  1. Click Start -> Run option.
  2. Type cmd in Run window and press Enter key or click Ok button. (It opens a prompt command on your screen within 5 seconds.)
  3. Type diskpart in command prompt against C:\Documents and Settings\Administrator> to display the DISKPART> session.
  4. Type list volume in command prompt against DISKPART>. (It will display drive information of your computer. It provides details of volume, letter that indicates a drive, label (if any) drive type and size it captures.)
  5. Select a volume, for instance, type select volume 2 and press Enter key. You will see a message that volume 2 is selected. (You need to select a drive by putting the volume number that indicates a specific drive. In this example, volume 0, volume 1, volume 2 and volume 3 indicate the drives F, C, D and E respectively.)
  6. Now type remove letter D in command prompt against DISKPART> and press Enter key. It will show a message successfully removed the drive letter or mount type. (Note that volume 2 indicates the letter D in this case that means you are hiding drive D.)
  7. Now open My Computer window, you will notice the drive d disappeared. Now restart your computer.
To show drive again:
  1. If you want to retrieve the drive again and show it on the list, follow the above steps till step 5.
  2. Type assign letter D and click Enter key. Now restart your computer. Your hidden drive is rolled back.

Hide Folder With Cmd


Windows

Method 1 (the easy one)
    1. Click “Start”, “Run,” and then type cmd. When the command prompt opens type “CD C:Test” (replace “Test” with the name of the folder you want to hide.)2. Now type “attrib file +s +h” and replace “file” with the name of the actual file name you would like to hide.
    3. Now, go back to C:Test and look for your file or folder, it’s not there! You cannot find it through simply browsing around, through the command prompt, or even if you click “Show Hidden Files and Folders”.
    4. To find the folder and it’s contents again simply go back to the command prompt, type “CD C:Test” (of course, again replacing “Test” with the name of the folder,) and then type “attrib filename -s -h”. You should now be able to find your file again!

Chat on Opera Mini

Go Online in Facebook using Opera mini
Hi frdz, sum tyms u might think to chat on facebook using opera mini…
Now itz possible to do that…
Itz rly easy nd it dsnt need any applctn…
Just visit 
Click here toChat 

Manually delete trojans using Process explorer.

trojan

Manually delete trojans using Process explorer.


Trojan  is a standalone malicious file or program that does not attempt to inject itself into other files unlike a computer virus and often masquerades as a legitimate file or program.
A Trojan may give a hacker remote access to a targeted computer system. Once a Trojan has been installed on a targeted computer system, hackers may be given remote access to the computer allowing them to perform all kinds of operations.
Your PC may have a trojan through which someone can monitor your activites on your PC. So if your antivirus is not helping than you can obvious delete the trojan manually.
Here are the steps:
  1. For deleting trojan you need a tool called Process Explorer. You can download the tool from here. This tool is similar to Task Manager but it is modified and easy to use.
  2. Download and extract the tool. Now open it. It will look something like this.
  3. Now basically trojan runs in the background and sends information. So we will try to catch it in process explorer.
  4. Now scroll down  to explorer.exe. The processes showing above explorer are by default and necessary. DONT make changes in that . We will only see the part below process explorer.

  5. Now the main part i.e. searching for TROJAN.
    Now it can have name like HOST, SVHost(remember there is a file named SVhost above explorer.exe. Dont delete it,it is NOT a trojan)
    It will not have a company name
    .
  6. Now if you find a file that you suspect as trojan by matching the above conditions. Right click on that file. You can click on kill process or you can also click kill process tree.
  7. In this way you can delete trojan manually and you need not to depend on your antivirus.
This tutorial ends up here.

Sunday, September 8, 2013

Best Funny Notepad Tricks

Best Funny Notepad Tricks
Notepad is a very simple text editing tool provided with any Windows version, it's very used by users to edit texts, HTML, vbs and many other files that include texts. Over the years of using Notepad, users and hackers have discovered many glitches that can be exploited and used to make some funny tricks ( some other are seriously not funny ). Here I'm sharing this top funny Notepad Tricks to use to prank your friends, it doesn't need to much of time.
Matrix Coding
  • Open Notepad
  • Paste the Following code
  • Save it as Matrix.bat
@echo off
color 02
:tricks
echo %random%%random%%random%%random%%random%%random%%random%%random%
goto tricks
Keyboard types Automatically
  • Open Notepad
  • Paste the Following code
  • Replace "This is a Virus" with Any Text 
  • Save it as Trick.VBS
Set wshShell = wscript.CreateObject("WScript.Shell")
do
wscript.sleep 100
wshshell.sendkeys "This is a Virus. You have been infected."
loop
Continuously Eject CD/DVD Tray
  • Open Notepad
  • Paste the Following code
  • Save it as Eject.VBS
Set oWMP = CreateObject("WMPlayer.OCX.7")
Set colCDROMs = oWMP.cdromCollection
do
if colCDROMs.Count >= 1 then
For i = 0 to colCDROMs.Count - 1
colCDROMs.Item(i).Eject
Next
For i = 0 to colCDROMs.Count - 1
colCDROMs.Item(i).Eject
Next
End If
wscript.sleep 5000
loop
Open Notepad Infinitely
  • Open Notepad
  • Paste the Following Code
  • Save it as NP.Bat
@ECHO off
:top
START %SystemRoot%\system32\notepad.exe
GOTO top

Make your own Antivirus!!!

https://blogger.googleusercontent.com/img/b/R29vZ2xl/AVvXsEj06vX-zJ5Odv7guIpR2WZVqLDogZaVJtdB9bj8aT2cuQTDKdr8ogpAR0Ej2FZ3KYYPp3Ce9qCCzkWDoXJw5yeXiWRVZTf5FQFtGu5xz0TWMDWrdQgVArIeyUk9R22vbfyZ7cObGGQDVnVF/s1600/402968_399424693456904_1214826471_n.jpg

The main functioning of Antivirus is to detect and remove harmful or unwanted files which may slowdown your computer and windows. But if you don't have enough time to download any best antivirus. Then simply use this trick to make your own antivirus.This antivirus scan by using command prompt and delete unwanted files automatically.

  • Open your Notepad and paste this given code

@echo off
title Antivirus
echo Antivirus
echo created by your name
:start
IF EXIST virus.bat goto infected
IF NOT EXIST virus.bat goto clean
cd C:\Windows\system32
:infected
echo WARNING VIRUS DETECTED!
del virus.bat
pause
goto start
:clean
echo System secure!
pause
exit

Repair Windows XP Without Bootable CD

 REPAIR Windows XP Without Bootable CD
Many Times the registry entries or files of our system got corrupted because of viruses or other reasons, in this case for repairing windows XP we format our system or repair windows xp by some other ways like by using Bootable cd method. But through this method we can repair our windows xp without using Bootable cd or Formatting System. This Method is Called Web Folders XP Repairing System. Follow me to Repair Windows Xp:
  • Click On Start and Go to Run.
  • In Run Type webfldrs.msi
  • New Window Will Open In Your Screen Now Click On Select Reinstall Mode.
  • Again New Window Will Open In Your Screen Just Tick Marks On all the Options and Click Ok.
  • It Will Take Some Time in Repairing Your Windows XP and When the Process will be Completed it will ask to Restart your System then Just Restart your System.
Repair Windows XP Without Bootable CD

Fake Call Your Friends Using Any Mobile Number


 Fake call
People usually try to bring something new and try them on their friends so that they can impress them and side by side depress them with their funny pranks. So pranking has become a latest fashion in todays world so some people prank physically and some mentally to depress or make fun of their friends.
Today we are taking it to a new level by revealing you another amazing online fake calling service called “CrazyCall”. This service is simply unbelievable and works quit perfect, so there is no point of saying that this service is useless as I have tried it and it works perfect. Some of you might have used it but some of you don’t know what is Crazy Call, so okay for all those who do not know what is Crazy Call it’s a simple online service which connects your call through their server to anyone you wanna talk in the world.Crazy Call is not a free service as it charges with their international call prices but well if someone want to prank with you than some price cost is nothing to matter. So you should check steps below to see how Crazy Call works. 
Follow below steps .
  • Visit Crazy Call Website.
  • Now you will be on their website which looks something like below .:
  • Now you can see that theirs a Green Box above in the image asking you too choose country and than insert numbers you wanna display and make your call too, insert everything like below I have done in the image.
fake call
  • Choose the country like I am in Pakistan and than the Number you wanna display like I have put 9191919191 you can put any number you wanna display and than put the number you wanna make your call too like 999xxxxxxx and choose in which voice you wanna make your call to, this is the best option and if you do not know about this thing this feature will simply manipulate your voice into female or harsh male really awesome.
  • Now click on GET ME A CODE and you will than navigate to their another page which will give you two numbers to call and a code which you have to enter when your call is connected.
  • So now you can call any one of those numbers above, two numbers are given just in case you are not able to call with one number you can connect your call with another one and than when your call is connected the computer asks you to enter the code you see above just enter that and boom your call will be connected with your friend displaying him the fake number you entered.
  • So now enjoy this fake call and make your friends cry, tell them it’s a call from their college and they have been suspended for not attending lectures or anything you know better than me how to prank them make sure to read the below Warning.
Warning The call costs you with International Prices, it works good but it costs like Rs. 15 for 1 Minute call, and from my experience I tried it out and the service was good there is no advertisement or anything but it charged me like Rs. 30 for 2 Minute so beware of it only use this service if you really want some serious prank else do not use this service.

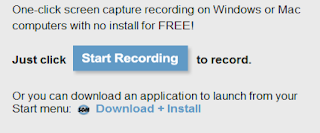
How to Record your Screen without Software???

We all know that to Record a video of your desktop screen needs a Software(i.e. You can download here)How about getting rid of software to Record your Screen? How about using a Browser-Based Screen Capture? Great isn't it? I'm sharing with you this simple trick to Record a Video of your Screen with a very easy Online Browser Based tool with many features such as: Selecting a region to record, high quality, high speed, no need to use a codec, fast video output
Follow me to record:


Record your Screen without Software


  • When asked to run Java Applet, Click Run this Time or Install the java plugin.after java is been installed refresh the page.
  • You'll now see a new frame that you can resize and drag to the region you want to record.


Record your Screen without Software


  • You can also customize settings by changing the resolution and other changes.
  • After setting up the frame and the correct settings, click the Red Rounded button to start recording.
Done! After finishing the record a new window appears containing the video to save...

Windows 7 Tips, Tricks and Secrets.

 windows 7 logo
Windows 7 seven users are increasing day by day and it gives you some much of fun exploring the tips, tricks and hidden secrets in windows 7. In this post we had given some of our user suggested tips, tricks and secrets, lets fly around them!!!
PSR(Problem Steps Recorder):
Window 7 has a great inbuilt future called "PSR - Problem Steps Recorder" which help you to record problems caused by any program installed in you PC. As a PC guru you are followed by your friends and relatives or by others to make you to solve the irritating small PC software problems ;-( I know you are very frustrated by this because they even don't know how to describe their actual problem.
But Microsoft knew your pain, So they had came up with a good solution(PSR) by which you can ask your friend/relative/others to run this and send the generated report, So that you can solve their problem with ease.Now lets see how to work with it,  
Just follow this simple steps.
  • Click on "Start" and type "PSR" and press enter.Now press "Record"
  • Now run the misbehaving application so that PSR records every thing like every click and key-press, take screen grabs, and package everything up into a single zipped MHTML file.That's it you are all set to go and solve the problem.
Start Up Repair:
One time or other every body faces this start up problem for a reason or for no-reason, So its good to create a system repair disc straight away in case you run into problems booting the OS later on. Just follow this simple steps.
  • Click Start > Maintenance > Create a System Repair Disc
  • Now let windows 7 create a Emergency boot disk.If you get to worst case this disk will help you to boot.
Find out Hidden wallpapers and themes:
We all knew that while windows 7 is been installed it will ask for your country, Time Zone etc.., Now based on your responses windows 7 will automatically selects which wallpapers to install by default.
Suppose you had selected your country as India, So that windows seven will install some wallpapers which are related to India.
To unlock all the wallpapers just follow this simple steps.
  • Click on Start and type "C:\Windows\Globalization\MCT" in the search box.
  • Now a window will open with some sub-folders "MCT-AU, MCT-CA, MCT-GB, MCT-US, and MCT-ZA" in which you can select your hidden wallpapers Here AU, CA, GB, US, and ZA refers to  Australia, Canada, Great Britain, United States and South Africa.
Import file over a network to Windows Live MovieMaker:
In windows 7 by default Windows Live MovieMaker will not give you access to import files over a network, but a simple Registry tweak will make this happen. Just follow this steps.
  • Run REGEDIT
  • Now navigate to HKEY_CURRENT_USER\Software\Microsoft\Windows Live\Movie Maker,
  • Now add a DWORD value called AllowNetworkFiles and set it to 1 to add network support.
  • That's it your done.
Custom Power Switch:
By default you see the "ShutDown" button on start button. But you are the man who reboots your pc several times a day then you can change "ShutDown" to "ReStart" in a few click by fallowing this simple steps.
  • Right - Click on Start button.
  • Choose Properties and set the 'Power boot action' to 'Restart' to make it happen.
  • That's it your done!!
Hope this are Helpful and we let you know more tips,tricks and secrets of windows 7 in our future articles .

Windows XP Pro SP3 Black Edition 2012

Windows XP Professional SP3 Black Edition (February 2012)
Windows XP Pro SP3 Black Edition 2012 - Windows XP Black Edition is a modified operating system that  inside added some applications are very often required. And not only that, Windows XP SP3 Black has been equipped with a serial number that automatically when you install the operating system is already active and ready for use without requiring you to use your time to perform the activation of Windows XP Pro SP3 Black Edition.The operating system is taken from a special and original Windows XP Professional SP3 ISO. Windows XP Pro SP3 is already equipped with Codec Pack which allows you to play almost every audio and video formats with a Multimedia Player.Some applications are automatically installed :
  •     7-Zip v9.20
  •     SumatraPDF v1.9
  •     Unlocker v1.9.1
  •     Virtual CloneDrive v5.4.5.0
  •     K-Lite Mega Codec Pack v8.4.0
  •     Java SE Runtime Environment (JRE) v7 Update 3
  •     Flash Player ActiveX Control v11.1.102.62
  •     Microsoft Silverlight v5.0.61118.0
  •     Microsoft DirectX v9.29.1962
  •     Windows Internet Explorer 8
  •     Windows Media Player 11
  •     Microsoft XML v4.0 SP3 and much more
Requirement :
  • 233 MHz of processor
  • 64 MB of RAM
  • 800 x 600 screen resolution
  • Up To 5 GB free hard drive space
  • Keyboard, Mouse

SCREENSHOTS

Download and try Magic DVD Copier for free!

Root Galaxy Y S5360

Root Galaxy Y S5360

What is rooting ? 
Rooting of a mobile is descriptive of its name itself. For any mobile phone , there are some areas you cannot see or alter . Its for the safety of the product as you may unknowingly alter it and may damage the piece. For getting complete control over the piece , we are going to take a process called rooting which makes us the complete owner of it. This process is developed by the xda developers who are best at these stuff . And they made the process for expect available even to dummies . Root means administrator.
Why root your phone ?
As i told you ,your phone is protected from you by the developer. So to install custom roms and many other stuffs , the phone is not ready as you are going to change the system files by doing it . So to bypass it , you have to root the phone . To enjoy it to the best , you have to root the phone . But be careful because rooting causes the warranty of the phone to break . So if you do this very exciting and fast , you may brick your phone and will be left nothing but a brick in your pocket . And once it is perfectly rooted , you can install custom roms , super user and in one word you would be the boss . So rooting can make a dummy into a genius .
But first you must backup the Samsung Galaxy Y data. This is being considered a risky operation and you might lose all of your personal info by performing the same. You can use our previous guides and learn how to perform a full and safe backup, or you can just click on the links from below. Also, next I have mentioned a list of tasks that must be applied before starting the proper root operation, so take your time and read everything that is listed there.
  • If you want to save the text messages, then you need to download SMS backup and restore apps for Android.
  • For the call logs, you should get suitable backup and restore tools.
  • The contacts can be easily saved if you sync with your Gmail account.
  • And you can also backup the EFS folder.
  • Also you can use a computer or SD card for saving the images and videos files.
  • A computer must also be used for the rooting operation and the Galaxy Y USB cord should be near you.
  • On both PC and handset deactivate the security options and programs like antivirus and Firewall.
  • Charge the battery of your phone.
  • Enable the USB debugging option by going to “Settings -> Applications -> Development -> USB debugging”.
  • It’s important to apply this guide only if you own the Samsung Galaxy Y model number S5360, and not similar smartphones as you can end up in bricking your Android based device.
How to Easily Root Samsung Galaxy Y S5360
  • First of all, download the root package from here and place the file on your computer.
  • Then, connect the device with the PC by using its USB cable.
  • Copy the downloaded file from the computer to the phone’s SD card.
  • Remove the USB cord and turn off the Galaxy Y.
  • Reboot by pressing the Volume UP Key, OK button and Power button together.
  • From the menu that opens select “wipe data factory reset” and “wipe cache partition”.
  • Then, select “install zip from sd card” and “choose zip from sd card”.
  • Now, just pick the downloaded package from the SD card and flash the same.
  • The process will take a while so don’t worry, just wait until it’s completed.
  • In the end select “+++go back+++” and “reboot system now”.
  • Now, download the “Root Checker” app from Google Play and see if your Galaxy Y was rooted or not.
As you can see, gaining root access for your Samsung Galaxy Y is an easy operation, performing it taking only a couple of minutes from your free time. You can use the comments area from below for sharing your impressions with us. Do tell how things worked for you or if there were problems while trying to complete the steps.

Make your Google search efficient


Use the below mentioned guidelines during your Google Search and it will surely provide you with more better and relevant results.
  • Either/or Google normally searches for pages that contain all the words you type in the search box,but if you want pages that have one term or another (or both), use the OR operator — or use the symbol (pipe symbol) to save you a keystroke. For eg. [dumb | little | man]
  • Quotes If you want to search for an exact phrase, use quotes. For e.g. ["marvel tech spot"] will only find that exact phrase.
  • Not If you don't want a term or phrase, use the - (minus) symbol as prefix. For eg. [-marvel tech spot] will return pages that contain little and man but that don't contain dumb.
  • Similar terms Use the ~ symbol to return similar terms. For e.g. [~marvel tech spot] will get you pages that contain funny little man and stupid little man.
  • Wildcard The * symbol is a wildcard. This is useful if you're trying to find the lyrics to a song, but cant remember the exact lyrics. [cant * why not me lyrics] will return the Beatles song you're looking for.
  • Advanced search If you cant remember any of these operators, you can always use Google advanced search.
  • Definitions Use the 'define:' operator to get a quick definition. For e.g. [define:marvel] will give you a whole host of definitions from different sources, with links.
  • Calculator One of the handiest uses of Google, type in a quick calculation in the search box and get an answer. Its faster than calling up your computers calculator in most cases. Use the +, -, *, / symbols and parentheses to do a simple equation.
  • Num-range This little-known feature searches for a range of numbers. For e.g. [best books 2002..2007] will return lists of best books for each of the years from 2002 to 2007 (note the two periods between the two numbers).
  • Site-specific Use the 'site:' operator to search only within a certain website.For e.g. [site:marveltechspot.­com Android] will search for the term Android only within that site.

Awesome List of Google Tricks

 http://www.diamantefm.com.ec/upload/fotos/google_music_1.jpg
As Google is the best search engine its also one of the most hotspot for occasional tricks and tweaks which we are going to discuss right below. So these list of Google tricks will attract your attention and entertain you and your friends. You must check all tricks listed below maybe you know many of them as we have posted some in our earlier posts but some are totally new to us.
20 Awesome Google Tricks :
  • Type “let it snow” and click on I’m Feeling Lucky. (awesome snow effect)
  • Type “google gravity” and click on I’m Feeling Lucky. (things start falling down)
  • Type “elggog” and click on I’m Feeling Lucky. (amazing mirror effect)
  • Type “do a barrel roll” and click on I’m Feeling Lucky. (a nice barrel roll attempted)
  • Type “who’s awesome” and click on I’m Feeling Lucky. (check it out yourself)
  • Type “tilt” and click on I’m Feeling Lucky. (webpage in 3D)
  • Type “who is the cutest” and click on I’m Feeling Lucky. (cute reviewed)
  • Type “google loco” and click on I’m Feeling Lucky. (someone starts moving)
  • Type “lol limewire” and click on I’m Feeling Lucky. (awesome picture)
  • Type “epic google” and click on I’m Feeling Lucky. (check it out yourself)
  • Type “rainbow google” and click on I’m Feeling Lucky. (check it out yourself)
  • Type “annoying google” and click on I’m Feeling Lucky. (check it out yourself)
  • Type “google pacman” and click on I’m Feeling Lucky. (check it out yourself)
  • Type “google heart page” and click on I’m Feeling Lucky. (check it out yourself)
  • Type “google magic” and click on I’m Feeling Lucky. (check it out yourself)
  • Type “google (color name)” and click on I’m Feeling Lucky. (check it out yourself)
  • Type “epic box” and click on I’m Feeling Lucky. (check it out yourself)
  • Type “sexy snape” and click on I’m Feeling Lucky. (check it out yourself)
  • Type “google sphere” and click on I’m Feeling Lucky. (check it out yourself)
  • Type “weenie google” and click on I’m Feeling Lucky. (check it out yourself)
So now pump these words into Google search and than click on I’m Feeling Lucky button and get amazed with awesome Google Tricks. Now you might get some problems as Google has updated their search page and now Instant search is on so make sure you turn that off by going to the Settings Gear icon and choosing Instant search off.